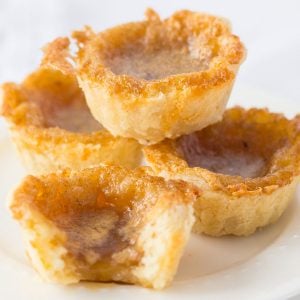
Old Fashioned Butter Tarts
Indulge in some sweet Old Fashioned Butter Tarts. This popular Canadian classic dessert recipe consists of flaky homemade pastry shells filled with a rich, buttery caramel filling. Passed down from my Mom, this is the best butter tart recipe you will find!
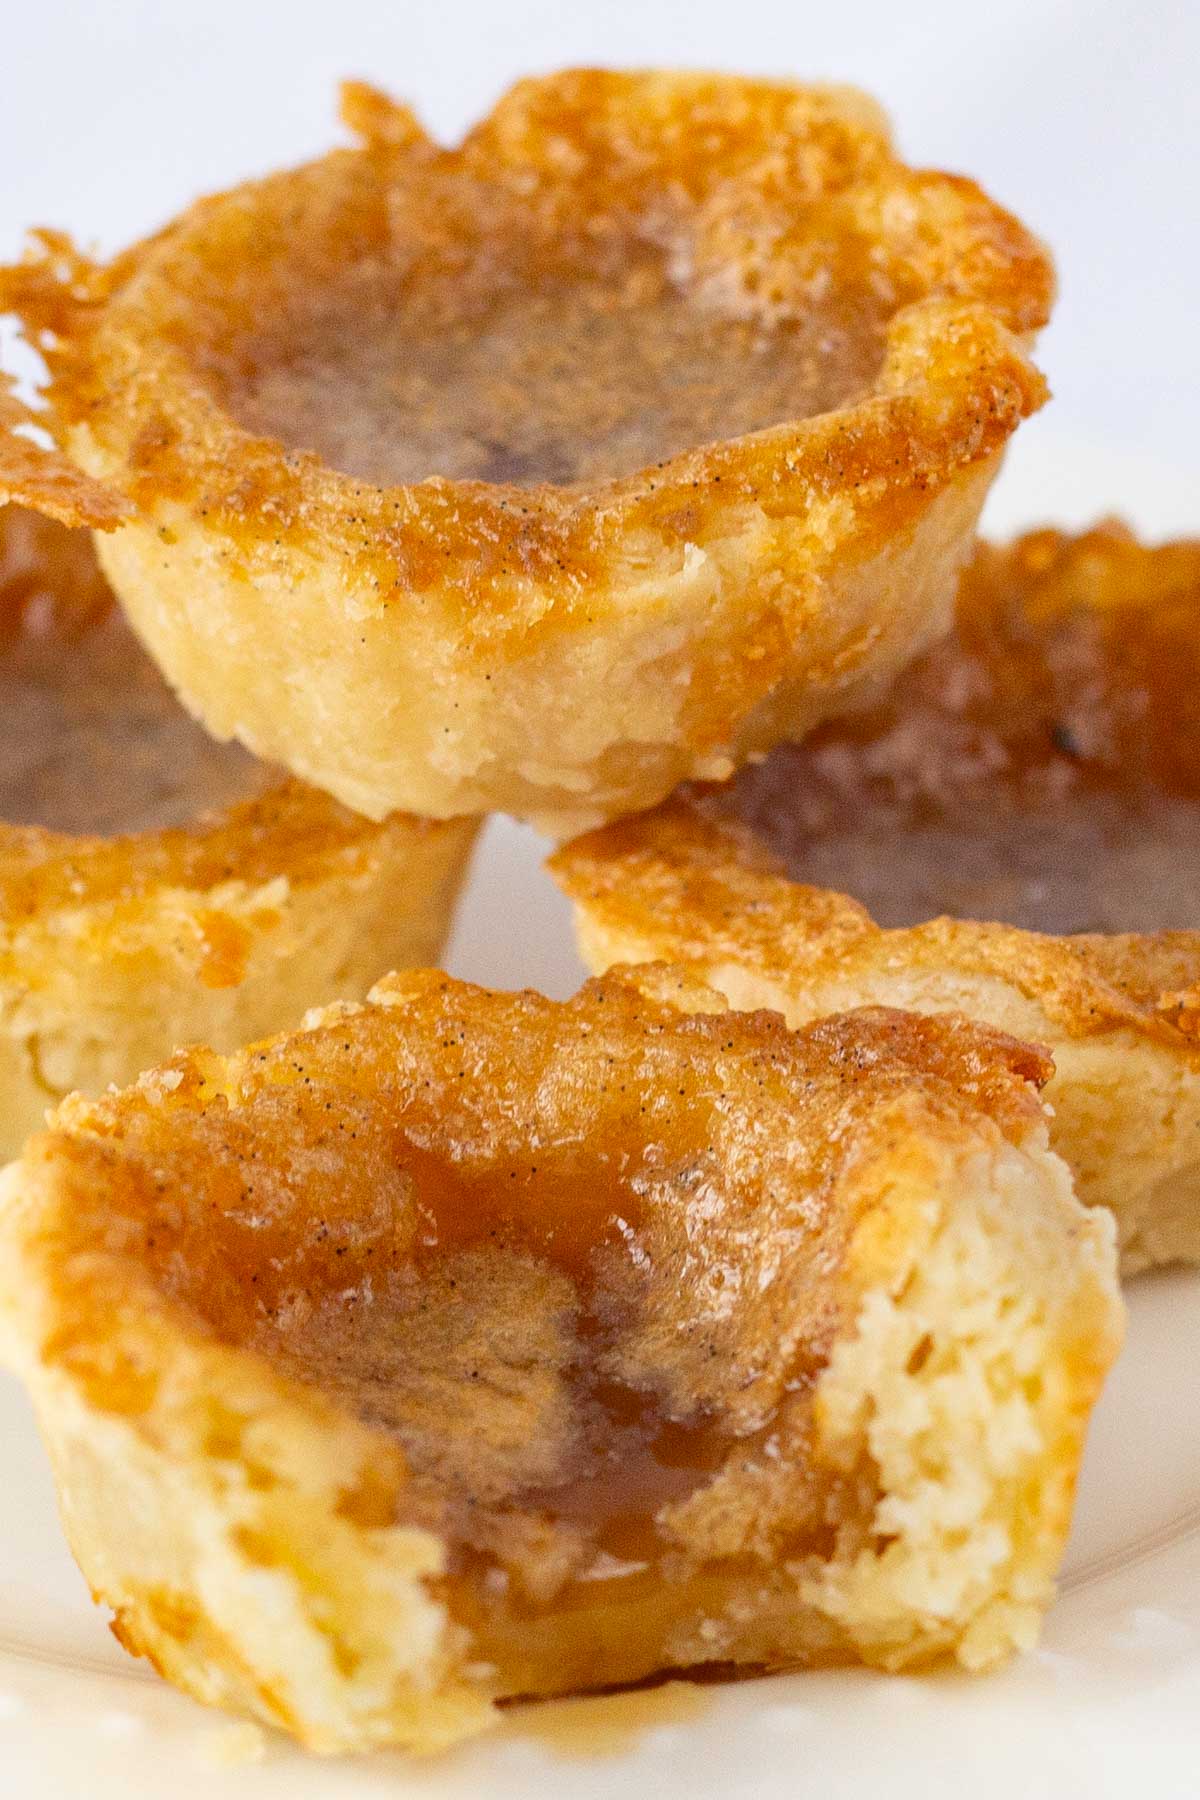
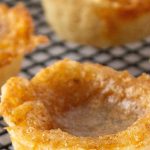
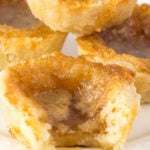
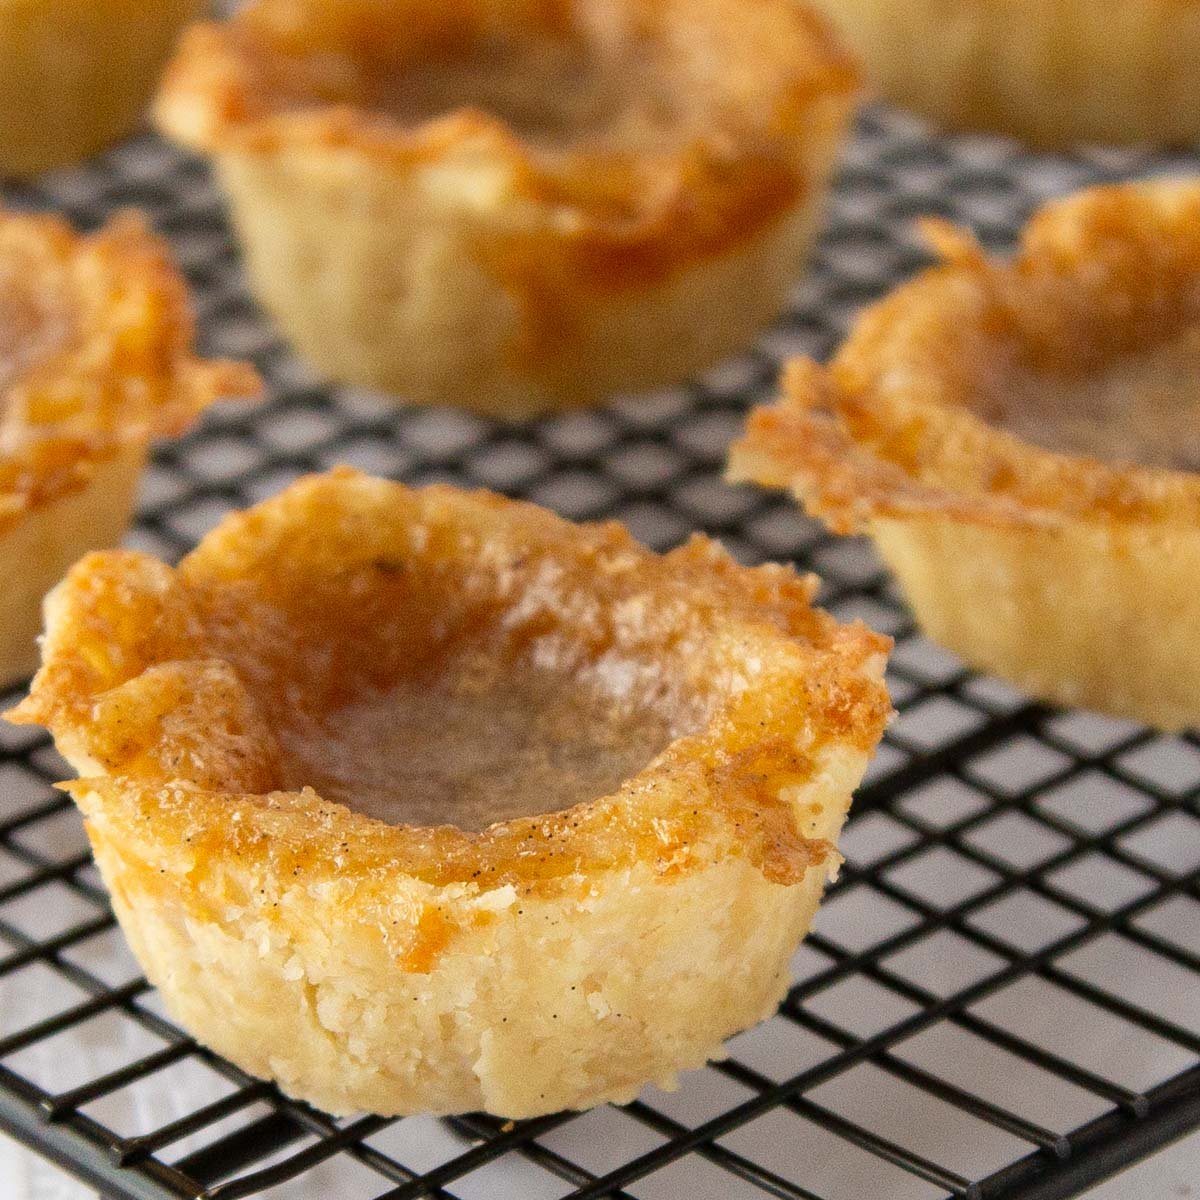
This best ever recipe for Old Fashioned Butter Tarts is always included in my Holiday baking. But these sweet tarts are so delicious you will want to bake them all year long! My Mom’s recipe for butter tarts has a perfect consistency of gooey, runny, sweet filling in made-from-scratch pastry shells. The tart shells are exceptionally buttery and flaky. Every family Christmas my Mom made Butter Tarts and they were always the first treat to disappear off her holiday baking tray!
Are Butter Tarts really Canadian?
Yes, Canada’s favorite dessert has origins which date back to the 1600’s! The Canadian Butter Tart is a small flaky pastry with a filling of butter, eggs, and brown sugar which are baked until the top is slightly crunchy and the filling is semi-solid.
Another incredible classic Canadian dessert you will love is my recipe for Nanaimo Bars.
Ingredients and Substitutions
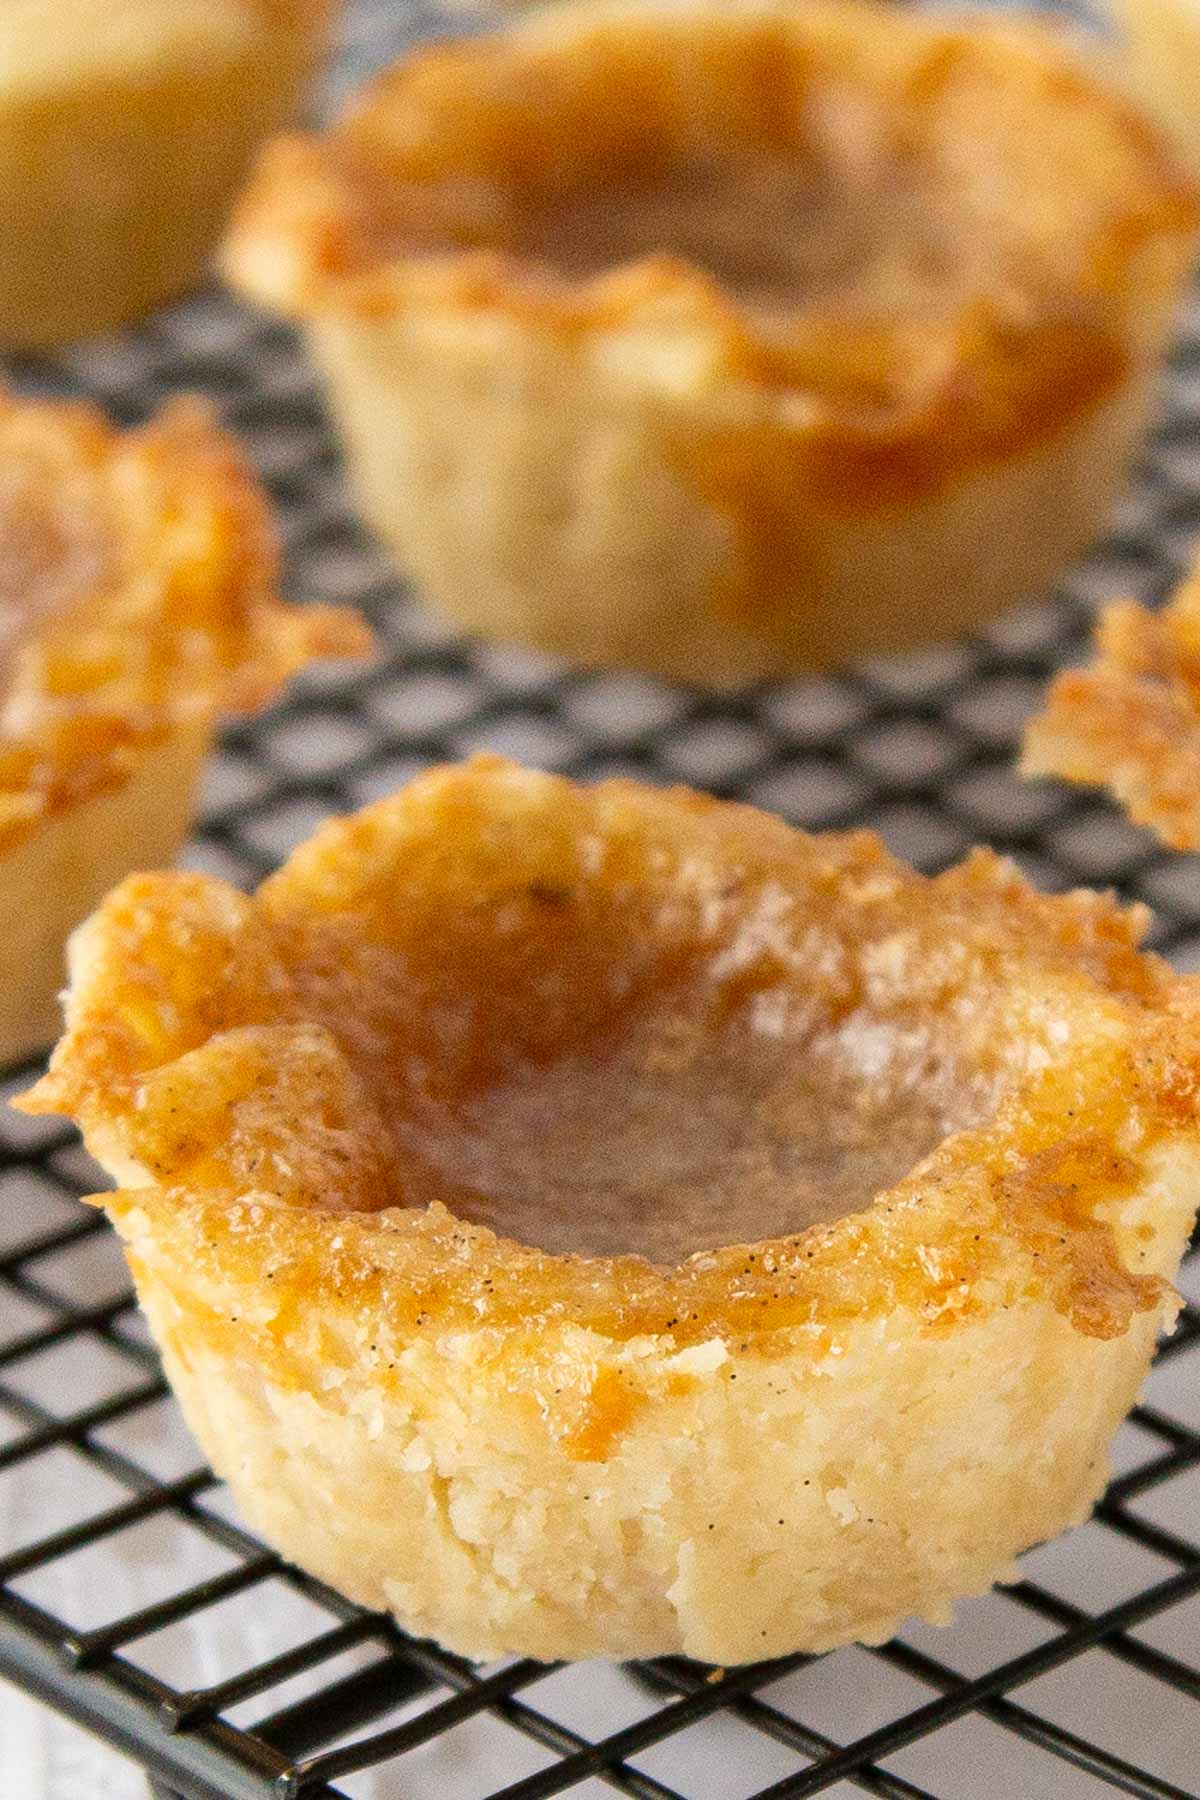
The ultra flaky tart crust is a simple combination of flour, sugar, salt, butter, and ice cold water.
Can you use store bought tart shells?
Yes, although not as tasty and flaky as homemade tart shells, they do help make this recipe quicker and easier to prepare.
I love the filling exactly as my Mom made it in this recipe. A mixture of butter, brown sugar, corn syrup, eggs, vanilla and a pinch of salt.
Some tasty additions to try would be:
- raisins
- currants
- nuts such as pecans or walnuts
Can you use maple syrup instead of corn syrup in butter tarts?
Yes, although I find them a bit more runny, and you will have the distinctive maple flavor.
How to store Butter Tarts
Store in an airtight container at room temperature for 2 days, and up to 5 days in the refrigerator.
Can Butter Tarts be frozen?
Yes, butter tarts freeze well. Cool completely, place in an airtight container for up to 3 months.
How to make these tasty treats
For the pastry:
- Sift flour, salt and sugar together. Using a pastry blender cut the chilled butter into the flour mix. Blend until it resembles course meal.
- Add ice-cold water a bit at a time, just until the dough starts to hold together. Do not over-work the pastry dough or it will become tough. The same technique you use making pie crust.
- Press dough together forming a disk, wrap in plastic wrap and refrigerate for 30 minutes.
- Next, roll out the dough on lightly floured surface, to about 1/4 inch thick.
- Using a round cookie cutter, cut into 4-5 inch circles. Press dough into muffin pan, trying not to stretch the dough.
For the filling:
- Mix together butter, brown sugar and corn syrup. Whisk until the butter is creamed and sugar dissolved.
- Add egg, vanilla extract and pinch of salt. Mix well.
- Fill the tart shells about 2/3 full.
- Bake in the oven at 400º Fahrenheit for 15-20 minutes until golden brown. Cool for 10 minutes, then remove from baking pan to cooling rack.
Mom’s favorite baking treats
My Mom was an incredible baker and these are some of her most loved recipes!
Old Fashioned Butter Tarts
Ingredients
Tart Pastry
- 2 2/3 cups all purpose flour
- 1 tablespoon sugar
- 1 teaspoon salt
- 1 cup butter chilled and cut into pieces
- 1/4-1/2 cup ice cold water
Butter Tart Filling
- 1/2 cup soft butter
- 1/2 cup brown sugar packed
- 1/2 cup corn syrup golden
- 2 eggs slightly beaten
- 1 teaspoon vanilla
- pinch of salt
Instructions
Butter Tart Pastry
- Sift flour, salt and sugar together.
- Using a pastry blender cut butter into flour mix until it resembles course meal.
- Add cold water a bit at a time until dough just starts to hold together. Adding too much water will make for a tough dough. Do not over-work the dough.
- Press dough together forming a disk.
- Wrap in plastic wrap and refrigerate for at least 30 minutes.
- Roll out the pastry dough to 1/4 inch thickness. Cut into sixteen 4-inch circles or twelve 5-inch circles.
- Press the dough into muffin tins being careful not to stretch the dough.
- Refrigerate until the filling is prepared.
Butter Tart Filling
- In a large bowl, mix together butter, brown sugar and corn syrup. Stir until the butter is creamed and the sugar is dissolved.
- Add eggs, vanilla and pinch of salt. Mix well.
- Fill the tart shells about 2/3 full with the filling.
- Bake at 400º Fahrenheit for 15-20 minutes.
- The filling should be lightly browned and bubbling.
- Let the butter tarts cool in pan for about 10 minutes. Transfer to rack to cool completely.
Notes
Nutrition


Thank you Old Fashioned Recipes, it is an family favourite.
Hey, I made these yesterday and the filling never firmed up. It’s super runny. Any ideas on where I went wrong?
Hi Hella, for this recipe the filling shouldn’t firm up, it is suppose to be gooey and a bit runny. If it is too runny you may try refrigerating them for a while.
I used this recipe for years and made thousands of tarts for my restaurant. You can make the filling firmer by just baking longer. The entire secret is oven temp and baking time. Your oven may not bake the same as mine therefore bake, bake, bake and with practice, you choose a time and temp that produces tarts exactly as you like them.
Thanks Annette for the great tips, I agree, everyone prefers their butter tarts a certain way. I personally like them quite runny. Messy but good.
How many dozen dies this recipe make?
This recipe makes 16 tarts Kim
Thanks so much swirls and spice
Golden is the type of corn syrup, not the brand, the label should have on it Golden corn syrup. It is usually a golden brown colour. I used Crown brand.
Recipes passed down from Grandmas are the absolute best!
I have never used a substitution, about the only thing that comes to mind to try might be agave nectar.
Maple syrup. great replacement
These look incredible!!
Thank you Amber! Hope you had a special Christmas.
Thank you for sharing that special story. It is funny how certain food can bring back fond memories. Have a very Merry Christmas!
thank you Dina!